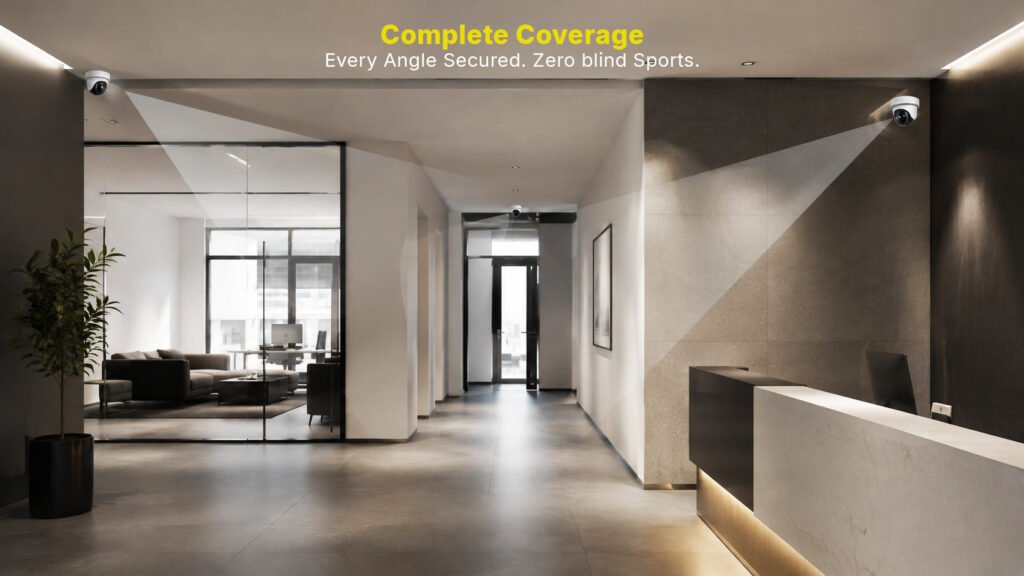
Planning an indoor CCTV system starts with the space, not the camera.
A high-resolution camera can still leave important areas outside its view. Walls, furniture, doors, lighting, lens selection, and camera position can all affect CCTV coverage.
A good plan identifies the areas that need monitoring, chooses suitable camera positions, checks the field of view, and tests the footage after installation.
This guide explains how to plan indoor CCTV coverage, identify blind spots, choose the right camera position and lens, and check the system after installation.
Key Takeaways
- Start with the floor layout before choosing camera positions.
- Identify entrances, corridors, restricted areas, and other priority locations.
- Check the camera’s field of view and viewing distance.
- Choose a lens based on the area you need to monitor.
- Keep walls, doors, furniture, and other objects from blocking the view.
- Check lighting, glare, reflections, and low-light areas.
- Use overlapping coverage where one camera may not provide enough visibility.
- Test the actual footage after installation.
- Review camera coverage when the property layout or security needs change.
Why Indoor CCTV Coverage Planning Matters
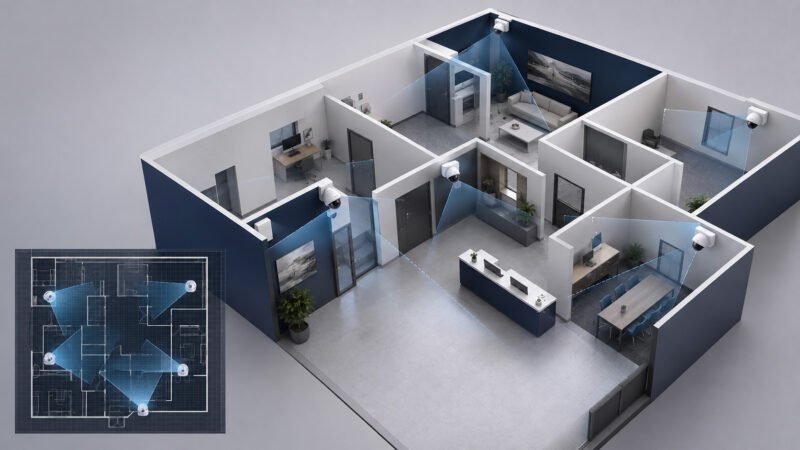
A well-planned CCTV layout helps cover important areas while reducing indoor surveillance blind spots.
Good camera placement can provide useful coverage without adding unnecessary cameras.
Start by understanding the property. Look at the floor layout, entrances, rooms, corridors, and movement paths.
Then decide what each camera needs to see.
For example, an entrance may need a clear view of people entering the property. A corridor may need wider coverage. A restricted room may need a more focused view.
This creates a simple planning process:
Property layout → security needs → camera position → field of view → lens → lighting → coverage test
Following this order helps reduce blind spots and avoids choosing cameras before understanding the space.
Map the Indoor Floor Layout
Before installing cameras, identify the areas that need surveillance.
A floor plan gives you a clear starting point. Mark the main rooms, doors, entrances, corridors, and other important locations.
Identify Entrances and Exits
Entrances need careful camera coverage. They connect outside movement with the inside of the property.
Mark:
- Main entrances
- Secondary entrances
- Exit doors
- Internal access doors
- Stairway access points
Think about the direction people use when entering and leaving. The camera should provide a useful view of that movement.
Identify Priority Areas
Different properties have different security priorities.
These may include:
- Reception areas
- Customer areas
- Counters
- Workspaces
- Corridors
- Storage rooms
- Equipment areas
- Restricted rooms
Not every area needs the same type of coverage. Give greater attention to locations where visibility matters most.
Map Common Movement Paths
Look at how people move through the building.
Entrances, corridors, doorways, and intersections can be more important than the center of a large room.
Mapping these paths helps you decide where the camera should face and which areas may need more than one camera.
How to Identify CCTV Blind Spots
A CCTV blind spot is an area that the planned camera coverage does not properly capture.
A room can have a camera and still contain blind spots.
Check Walls and Partitions
Walls and partitions can block part of the camera view.
Check areas behind:
- Walls
- Partitions
- Columns
- Doors
- Shelving
- Large furniture
- Equipment
A camera may show most of a room while missing an important area behind an obstruction.
Check Corners and Hidden Areas
Pay close attention to:
- Room corners
- Areas behind doors
- Spaces behind furniture
- Areas between partitions
- Shelving gaps
- Narrow corridors
Walk through the property and consider what the camera can and cannot see from each proposed position.
Look for Coverage Gaps
Do not judge coverage only by the size of the image.
Ask a more useful question:
Can the camera provide enough visibility of the area that matters?
This distinction becomes important when selecting the camera lens and viewing distance.
Understand Field of View and Viewing Distance
The field of view determines how much of an area the camera can see.
A wider field of view covers more space. A narrower field of view gives a more focused view.
Camera Distance Affects Image Detail
Camera distance affects the amount of useful detail in the footage.
Seeing a person or object in the frame does not always mean the footage provides enough detail.
For example, a camera may show an entire room but provide limited detail for a person standing far from the lens.
Consider these factors together:
Camera distance → field of view → image detail → security purpose
Wide-Angle vs Focused View
A wide-angle view can cover a larger indoor area.
A focused view may work better for a doorway, counter, or access point.
Neither option is automatically better. The right choice depends on what you need the camera to monitor.
Choose the Right CCTV Lens
Lens selection should follow the coverage requirement.
The wrong lens can create a coverage problem even when the camera itself has good image quality.
Fixed Lens
A fixed lens provides a set viewing angle.
It can work well when the camera position and coverage area are already known.
Pros
- Simple setup
- Predictable viewing angle
- Suitable for fixed coverage areas
Cons
- Less flexibility after installation
- May require repositioning if the coverage requirement changes
Varifocal Lens
A varifocal lens allows the viewing angle to be adjusted during installation.
This can help when the exact viewing distance or coverage requirement needs fine-tuning.
Pros
- Flexible viewing angle
- Useful for different installation distances
- Easier to fine-tune during setup
Cons
- May cost more than a basic fixed-lens camera
- Extra flexibility may not be necessary for simple areas
A useful planning relationship is:
Area size → camera distance → field of view → lens selection
Choose the Right Camera Position
Once you understand the area and lens, decide where to mount the camera.
Wall Mounting
Wall mounting works well when the camera needs a specific viewing direction.
It can be useful for entrances, corridors, and other areas where a focused view is required.
Ceiling Mounting
Ceiling mounting can provide a broader view in some indoor spaces.
It may work well in open areas where the camera needs to observe movement across a larger section of the room.
Consider Mounting Height
There is no single height that works for every property.
The right height depends on:
- Room layout
- Camera angle
- Lens
- Viewing distance
- Required image detail
- Objects that may block the view
The camera should have a clear view without being easily blocked by people, furniture, doors, or other objects.
Check the Camera Direction
The camera should face the area that matters most.
For an entrance, consider the direction of movement. For a corridor, consider the path people follow. For a counter, consider the area where activity takes place.
Good positioning follows the activity rather than simply pointing toward the largest open space.
Check Lighting Before Final Installation
Lighting can change the quality of CCTV footage.
A camera position that looks good during the day may produce a different result at night.
Avoid Strong Backlighting
Avoid pointing the camera directly toward a strong light source.
Bright windows can make people or objects in front of them harder to see.
Check Glare and Reflections
Glass, mirrors, polished surfaces, and other reflective materials can affect the image.
Check these areas before fixing the final camera position.
Check Low-Light Areas
Review areas such as:
- Dark corridors
- Storage rooms
- Areas with limited natural light
- Covered entrances
- Rooms with uneven lighting
The goal is consistent and useful footage across the conditions in which the camera will operate.
Fixed vs. PTZ Cameras for Indoor Coverage
Camera type should come after the coverage requirement.
Fixed Cameras
A fixed camera provides a consistent view of one area.
It can work well when continuous coverage of a particular location is required.
Pros
- Consistent viewing direction
- Dedicated coverage
- Simple positioning
Cons
- Limited viewing direction
- Repositioning may be needed if requirements change
PTZ Cameras
A PTZ camera can change its viewing direction.
This makes it useful when an operator needs to inspect different areas.
Pros
- Adjustable viewing direction
- Flexible monitoring
- Useful for larger or changing viewing requirements
Cons
- Cannot monitor every direction at the same time
- An area may be outside the view while the camera is facing elsewhere
- Requires suitable monitoring and operation
A PTZ camera does not automatically remove blind spots. Fixed cameras may still be needed for areas that require continuous dedicated coverage.
Consider Coverage Overlap
Overlapping coverage means that an important area can be seen by more than one camera.
This can help when one camera cannot provide enough visibility.
Where Overlap Can Help
Consider additional coverage around:
- Main entrances
- Long corridors
- Corridor intersections
- Important access points
- High-priority areas
Avoid Unnecessary Overlap
Adding cameras everywhere can increase:
- Equipment costs
- Network requirements
- Recording volume
- Storage requirements
- Maintenance needs
Use overlapping coverage where it provides a clear security benefit.
Coverage Is Not the Same as Identification
A camera can cover an area without providing enough detail to identify what is happening there.
This is why CCTV planning should consider more than the size of the camera image.
Think about the difference between:
Coverage → detection → recognition → identification
A wide-angle camera may be suitable for monitoring general movement across a room.
A more focused camera may be better when the goal is to capture greater detail at a specific doorway or access point.
The security objective should therefore guide the camera position, lens, and viewing distance.
Test CCTV Coverage After Installation
The installation plan is only the starting point.
Always check the actual camera footage after installation.
Check the Live View.
Confirm that the camera sees the areas identified during planning.
Look for Blind Spots
Walk through important areas and compare what you see in person with what appears in the camera view.
Check Image Detail
Look at subjects at different distances.
Make sure the footage provides the level of detail required for the intended purpose.
Test Different Lighting Conditions
Check the camera during relevant lighting conditions.
Look for:
- Glare
- Reflections
- Shadows
- Bright windows
- Low-light areas
Adjust the Camera if Needed
If the footage does not provide the expected coverage, change the camera angle or position.
The final result matters more than following the original drawing exactly.
Common Indoor CCTV Planning Mistakes
Choosing Camera Positions Without a Floor Plan
This can leave important areas uncovered while putting too many cameras in low-priority locations.
Choosing Cameras Only by Resolution
High resolution improves image detail. It does not expand the camera’s field of view.
Using the Wrong Lens
A narrow lens may cover too little area. A very wide lens may provide less detail at a distance.
Ignoring Lighting
Backlighting, glare, reflections, and low light can reduce image quality.
Placing Cameras Behind Obstructions
Doors, furniture, shelving, partitions, and equipment can block important parts of the view.
Assuming One Camera Covers an Entire Room
Room size, lens, mounting position, obstructions, and required detail all affect whether one camera is enough.
Assuming PTZ Removes All Blind Spots
A PTZ camera cannot monitor every direction at the same time.
Skipping the Final Coverage Test
Always review the actual footage after installation.
Indoor CCTV Planning for Different Properties
The basic CCTV planning process is similar across different indoor environments, but the priority areas can change.
An office may need coverage around reception areas, corridors, workspaces, and restricted rooms.
A commercial property may need more attention around entrances, customer areas, counters, storage, and stock areas.
For commercial properties, explore our guide to indoor security cameras for commercial spaces.
For smaller workplaces, the layout and access points may require a different approach. Our guide to indoor security cameras for small businesses covers that use case in more detail.
For a broader look at indoor camera options in Qatar, see our guide to the best indoor security cameras in Qatar.
Indoor CCTV and Privacy
Indoor surveillance should focus on areas where monitoring is needed.
Avoid monitoring areas where surveillance is not necessary. Limit access to recorded footage. Give system users only the permissions they need.
In Qatar, consider privacy requirements when planning indoor surveillance. Also check the rules that apply to the property.
This guide focuses on CCTV planning and coverage. It is not legal advice.
Indoor CCTV Coverage Checklist
Before completing the installation, check:
- Floor layout reviewed
- Entrances and exits identified
- Priority areas identified
- Movement paths considered
- Blind spots identified
- Field of view checked
- Viewing distance considered
- Lens selected for the area
- Camera position checked
- Mounting height considered
- Obstructions checked
- Lighting conditions reviewed
- Fixed or PTZ requirements evaluated
- Overlapping coverage considered
- Actual footage tested
- Coverage adjusted where needed
Frequently Asked Questions
How do you avoid blind spots in indoor CCTV?
Start with the floor layout, then check camera position, field of view, obstructions, and important movement areas.
What is the best height for an indoor CCTV camera?
The best camera height depends on the room and the required view. There is no single height for every property.
Does higher resolution improve CCTV coverage?
Higher resolution improves image detail, but it does not expand the camera’s field of view.
Can one CCTV camera cover an entire room?
Yes, one camera can cover some small or open rooms. Room size, lens, camera position, obstructions, and required image detail determine whether it is enough.
Is a PTZ camera better for avoiding blind spots?
A PTZ camera provides adjustable viewing, but it cannot monitor every direction at the same time. Fixed cameras may still be needed for dedicated coverage.
Should CCTV cameras have overlapping coverage?
Overlapping coverage can help in important areas where one camera does not provide enough visibility.
When should CCTV coverage be reviewed?
Review coverage after changes to the floor layout, furniture, entrances, lighting, camera position, or security requirements.
Conclusion
A high-performing indoor CCTV system relies on strategic pre-installation planning and accurate spatial analysis.
By evaluating floor layouts, movement paths, focal lengths, camera angles, and ambient lighting in advance, property managers can eliminate security gaps prior to hardware mounting.
Once deployed, conduct a comprehensive live-feed audit to evaluate image clarity, eliminate glare, and correct unmapped blind spots through immediate camera calibration.
In Qatar, the primary standard remains clear: achieve seamless indoor surveillance with maximum operational visibility across residential, commercial, and enterprise infrastructure.